firewalld 사용법


# 서비스 시작
[root@localhost ~]# systemctl start firewalld

# 서비스 재시작
[root@localhost ~]# systemctl restart firewalld

# 서비스 중지
[root@localhost ~]# systemctl stop firewalld

# 서비스 등록
[root@localhost ~]# systemctl enable firewalld

# 서비스 상태 확인
[root@localhost ~]# systemctl status firewalld

# firewalld 정책 저장 또는 적용
[root@localhost ~]# firewall-cmd --reload

# firewalld 설정파일 경로
[root@localhost ~]# vi /etc/firewalld/firewalld.conf

firewalld 존(zone) 관리

▷ 존(zone)은 방화벽에서 사용하는 영역별 그룹이라고 보면 됩니다. 방화벽을 기준으로 외부는 External(외부), 내부는 Internal(내부), 중간 영역인 DMZ 등 다양한 존으로 나눠서 그룹 관리가 가능합니다.

▷ firewalld 에서 기본으로 제공하는 존(zone)이 있으며, 신규 추가하여 사용도 가능합니다. 자세한 내용은 아래 내용을 참고하기 바랍니다.

# 사전 정의된 zone 목록 확인
[root@localhost ~]# firewall-cmd --get-zones
block dmz drop external home internal public trusted work

# 기본 설정 zone 확인
[root@localhost ~]# firewall-cmd --get-default-zone
public

# 기본 zone 변경
[root@localhost ~]# firewall-cmd --set-default-zone=external

# 현재 설정 확인
[root@localhost ~]# firewall-cmd --list-all

# 전체 zone 목록 상세 확인
[root@localhost ~]# firewall-cmd --list-all-zones

# 네트워크 인터페이스에 적용된 zone 리스트 확인 (변경 전)
[root@localhost ~]# firewall-cmd --get-active-zone
external
  interfaces: enp0s8 enp0s3

# 네트워크 인터페이스에 zone 변경
[root@localhost ~]# firewall-cmd --change-interface=enp0s3 --zone=public

# 네트워크 인터페이스에 적용된 zone 리스트 확인 (변경 후)
[root@localhost ~]# firewall-cmd --get-active-zone
external
  interfaces: enp0s8
public
  interfaces: enp0s3

# 신규 zone 추가
[root@localhost ~]# firewall-cmd --permanent --new-zone=test
success

# 기존 zone 삭제
[root@localhost ~]# firewall-cmd --permanent --delete-zone=test
success

firewalld 서비스 관리

▷ firewalld 서비스는 잘 알려진 포트 또는 어플리케이션 서비스를 사전 정의한 것입니다. 

▷ firewalld 서비스를 이용하면 ssh, telnet, icmp, mysql 등 잘 알려진 어플리케이션에 대해 별도 포트로 설정하지 않고 서비스 이름으로 관리가 가능합니다.


# 사전 등록된 서비스 목록 확인
[root@localhost ~]# firewall-cmd --get-services

# 사전 정의된 서비스 파일 위치
[root@localhost ~]# firewall-cmd --get-services

# 특정 zone에 허용된 서비스 리스트 확인 (서비스 추가 전)
[root@localhost ~]# firewall-cmd --list-service --zone=public
cockpit dhcpv6-client ssh

# 특정 zone에 서비스 추가 (http, https, dns, telnet)
[root@localhost ~]# firewall-cmd --permanent --zone=public --add-service=http
[root@localhost ~]# firewall-cmd --permanent --zone=public --add-service=https
[root@localhost ~]# firewall-cmd --permanent --zone=public --add-service=dns
[root@localhost ~]# firewall-cmd --permanent --zone=public --add-service=telnet

# 특정 zone에 서비스 삭제 (telnet)
[root@localhost ~]# firewall-cmd --permanent --zone=public --remove-service=telnet

# 서비스 추가 후 서비스 적용을 위해 방화벽 재시작
[root@localhost ~]# firewall-cmd --reload

# 특정 zone에 허용된 서비스 리스트 확인 (서비스 추가 후)
[root@localhost ~]# firewall-cmd --list-service --zone=public
cockpit dhcpv6-client dns http https ssh

firealld 포트(port) 관리

▷ firewalld 포트(port)는 위에서 설명한 firewalld 서비스에서 언급되지 않은 서비스의 포트를 등록할 때 사용합니다.


# 허용 포트 리스트 확인 (추가 전)
[root@localhost ~]# firewall-cmd --list-port --zone=public

# 특정 포트 TCP 8080, 8081 추가
[root@localhost ~]# firewall-cmd --permanent --zone=public --add-port=8080/tcp
[root@localhost ~]# firewall-cmd --permanent --zone=public --add-port=8081/tcp

# 특정 포트 TCP 8081 삭제
[root@localhost ~]# firewall-cmd --permanent --zone=public --remove-port=8081/tcp

# 포트 적용을 위한 방화벽 재시작
[root@localhost ~]# firewall-cmd --reload

# 허용 포트 리스트 확인 (추가 후)
[root@localhost ~]# firewall-cmd --list-port --zone=public
8080/tcp

firewalld IP 관리

▷ firewalld IP는 특정 IP나 IP 대역을 허용할 때 사용 합니다.


# 허용 IP 리스트 확인 (추가 전)
[root@localhost ~]# firewall-cmd --list-sources --zone=public

# 허용 IP 추가
[root@localhost ~]# firewall-cmd --permanent --zone=public --add-source=10.0.2.0/24
[root@localhost ~]# firewall-cmd --permanent --zone=public --add-source=10.0.3.0/24

# 허용 IP 삭제
[root@localhost ~]# firewall-cmd --permanent --zone=public --remove-source=10.0.3.0/24

# 허용 IP 적용을 위한 방화벽 재시작
[root@localhost ~]# firewall-cmd --reload

# 허용 IP 리스트 확인 (추가 후)
[root@localhost ~]# firewall-cmd --list-sources --zone=public
10.0.2.0/24

firewalld 정책(rule) 현황 확인

▷ firewalld 에서 생성한 정책(rule)은 존(zone)별로 관리되며, 아래 경로에서 확인할 수 있습니다.

 → 정책 경로 : /etc/firewalld/zones


# firewalld zone 경로 확인
[root@localhost ~]# ls -al /etc/firewalld/zones
total 20
drwxr-x---. 2 root root 110 Jan 10 08:29 .
drwxr-x---. 7 root root 159 Jan 10 08:25 ..
-rw-r--r--. 1 root root 304 Jan 10 07:53 external.xml
-rw-r--r--. 1 root root 328 Jan 10 07:53 external.xml.old
-rw-r--r--. 1 root root 489 Jan 10 08:28 public.xml
-rw-r--r--. 1 root root 523 Jan 10 08:28 public.xml.old
-rw-r--r--. 1 root root  54 Jan 10 07:30 test.xml.old

# public zone 정책 확인
[root@localhost ~]# cat /etc/firewalld/zones/public.xml

firewalld 로깅(logging) 설정

▷ firewalld 로깅(logging)은 방화벽에 접근한 로그를 남기는 것입니다. 로깅(lgging) 설정 방법은 아래와 같습니다.


# firewalld.conf에서 로깅 설정 변경
[root@localhost ~]# vi /etc/firewalld/firewalld.conf
LogDenied=off
->
LogDenied=all

# 서비스 재시작
[root@localhost ~]# systemctl restart firewalld

# 설정 확인
[root@localhost ~]# firewall-cmd --get-log-denied

# 로그 보기
[root@localhost ~]# dmesg | grep -i REJECT

# 로그 파일 생성 후 로깅 설정 (신규 파일 생성 후 아래 내용 추가)
[root@localhost ~]# vi /etc/rsyslog.d/firewalld-droppd.conf

:msg,contains,"_DROP" /var/log/firewalld-droppd.log
:msg,contains,"_REJECT" /var/log/firewalld-droppd.log
& stop

# rsyslog 서비스 재시작
[root@localhost ~]# systemctl restart rsyslog.service

# deny log 확인
[root@localhost ~]# tail -f /etc/firewalld-droppd.log
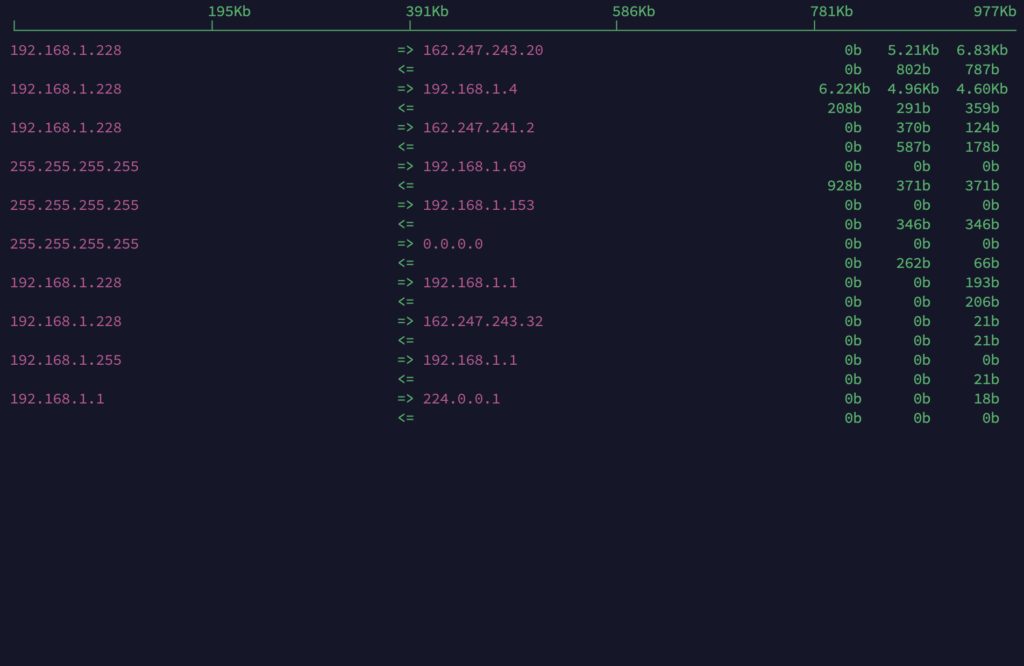
Iftop을 사용하여 Linux 네트워크 및 대역폭을 실시간으로 모니터링

서버에서 대역폭 및 분석가 네트워크 사용량을 모니터링해야 하는 경우가 있습니다.

이를 수행할 수 있는 많은 도구가 있습니다. 가장 간단하고 빠른 도구는 Linux에서만 명령 줄을 사용하는 것입니다.

Iftop은 가장 간단한 도구 중 하나이지만 서버 대역폭 사용량을 모니터링하는 데 유용합니다.

가장 높은 요청, 전송 및 수신 대역폭을 실시간으로 볼 수 있습니다.

top, htop 또는 iostat와 같습니다.

Iftop을 설치하는 방법

Epel 리포지토리 설치, 필요한 종속성 업데이트 및 설치

## Centos / RHEL 6 / 7
# yum install epel-release
# yum update
# yum install libpcap libpcap-devel ncurses ncurses-devel
# yum install iftop
## Centos / RHEL 8 / Fedora 22+
# dnf install iftop
## Ubuntu / Debian
# sudo apt-get install iftop

Iftop 사용 방법

Iftop의 기본 사용법은 iftop 명령을 실행하면 모든 인터페이스를 모니터링하고 호스트 이름을 조회하므로 IP 주소가 호스트 이름으로 변환됩니다.

# iftop

호스트 이름 조회를 끄려면 다음 명령을 사용하십시오.

# iftop -n

호스트 이름 조회가 없는 Iftop 네트워크 모니터링

특정 인터페이스에서 모니터링하려면 -i 옵션을 사용합니다. ifconfig 명령을 사용하여 네트워크 인터페이스를 확인합니다.

# ifconfig
# iftop -i enp4s0 -n

Fail2ban을 사용하여 나쁜 봇 LieBaoFast, MQQBrowser 및 Mb2345Browser를 차단하는 방법

Modsecurity를 사용하여 LieBaoFast, MQQBrowser 및 Mb2345Browser 차단

Nginx에는 모듈 modsecurity가 있으며 차단 목록 사용자 에이전트에 LieBaoFast, MQQBrowser 및 Mb2345Browser를 추가하려고합니다.

그런 다음 다음과 같이 테스트합니다.

curl -A "Mozilla/5.0 (Linux; Android 7.0; FRD-AL00 Build/HUAWEIFRD-AL00; wv) AppleWebKit/537.36 (KHTML, like Gecko) Version/4.0 Chrome/53.0.2785.49 Mobile MQQBrowser/6.2 TBS/043602 Safari/537.36 MicroMessenger/6.5.16.1120 NetType/WIFI Language/zh_CN" -I "https://serverdiary.com"

결과는 다음과 같습니다.

HTTP/2 403
 server: nginx
 date: Fri, 24 Jan 2020 13:21:18 GMT
 content-type: text/html
 content-length: 548
 vary: Accept-Encoding

그러나 Nginx 액세스 로그를 확인하면 여전히 액세스 할 수 있으며 여전히 200을 얻을 수 있습니다. Google 애널리틱스에 요청이 여전히 실시간으로 존재합니다.

결과가 403 또는 금지되어 있어도 modsecurity를 전달할 수 있는 이유를 알 수 없습니다.

Nginx 구성을 사용하여 LieBaoFast, MQQBrowser 및 Mb2345Browser 차단

두 번째 옵션은 Nginx 구성을 사용하여 해당 사용자 에이전트를 차단하는 것입니다.

Nginx if is Evil, Nginx 웹 사이트에서 If를 사용하지 않는 것이 좋습니다.

그러나 사용하고 싶다면 아래는 사용자 에이전트 LieBaoFast, MQQBrowser 및 Mb2345Browser를 차단하는 Nginx 구성입니다. 이것을 서버 블록에 넣으십시오.

if ($http_user_agent ~* (liebaofast|mqqbrowser|mb2345browser|zh-cn|zh_cn|micromessenger) ) {
    return 403;
}

또는 Nginx 맵을 사용하여 나쁜 봇을 차단할 수 있습니다

## Write your bad User agents want to block
map $http_user_agent $bad_bots {
        default           0;
        ~*scrapyproject   1;
        ~*nmap            1;
	~*sqlmap	  1;
	~*slowhttptest	  1;
	~*nikto		  1;
	~*magpie-crawler  1;
	~*python-requests 1;
	~*redback	  1;
        ~*liebaofast      1;
        ~*mqqbrowser      1;
        ~*micromessenger  1;
        ~*zh-cn           1;
        ~*zh_cn           1;
}
if ($bad_bots) {
    return 403;
}

위의 Nginx 구성은 최적이 아닙니다. 우리의 Nginx는 여전히 DDOS 요청을 받고 있으며, 이를 처리하고 요청을 거부하며, Nginx if가 권장되지 않는다는 것을 잊지 마십시오.

Fail2ban을 사용하여 LieBaoFast, MQQBrowser 및 Mb2345Browser 차단

최선의 선택은 File2ban을 사용하는 것입니다. 우리 nginx는이 중국 나쁜 봇으로부터 요청을받지 못했습니다.

# yum install epel-release
# yum install fail2ban fail2ban-systemd

/etc/fail2ban/filter.d/nginx-badbots.conf를 만들고 다음 구성을 붙여넣습니다.

[Definition]
mybadbots = Mb2345Browser|LieBaoFast|MQQBrowser|micromessenger|zh_CN|zh-CN|SeznamBot|trendictionbot|magpie-crawler
failregex  = ^<HOST> .*(GET|POST|HEAD).*(%(mybadbots)s).*$
ignoreregex =
datepattern = ^[^\[]*\[({DATE})
              {^LN-BEG}

/etc/fail2ban/jail.conf를 /etc/fail2ban/jail.local에 복사합니다.

# cp /etc/fail2ban/jail.conf /etc/fail2ban/jail.local

이 코드를 /etc/fail2ban/jail.local의 맨 아래에 추가하십시오.

#CUSTOM
#[DEFAULT]
# Ban hosts for one hour:
bantime = 3600

# Override /etc/fail2ban/jail.d/00-firewalld.conf:
banaction = iptables-multiport

[nginx-badbots]
enabled   = true
port      = http,https
filter    = nginx-badbots
logpath   = /var/log/nginx/*.access.log
findtime  = 43200
maxretry  = 1
bantime   = 86400
action 	  = iptables-multiport[name=BadBots, port="http,https"]

자동 시작 Fail2ban 활성화 및 서비스 시작

# systemctl enable fail2ban
# systemctl start fail2ban

로그온 /var/log/fail2ban.log 확인

# tail -f /var/log/fail2ban.log

Example output

2020-01-24 15:07:10,869 fail2ban.actions        [11121]: NOTICE  [nginx-badbots] Ban 27.209.165.186
2020-01-24 15:07:10,936 fail2ban.actions        [11121]: NOTICE  [nginx-badbots] Ban 60.168.87.136
2020-01-24 15:07:11,002 fail2ban.actions        [11121]: NOTICE  [nginx-badbots] Ban 27.38.49.133
2020-01-24 15:07:11,213 fail2ban.filter         [11121]: INFO    [nginx-badbots] Found 122.232.219.148 - 2020-01-24 15:07:11
2020-01-24 15:07:11,250 fail2ban.filter         [11121]: INFO    [nginx-badbots] Found 223.98.64.36 - 2020-01-24 15:07:11
2020-01-24 15:07:11,264 fail2ban.actions        [11121]: NOTICE  [nginx-badbots] Ban 122.232.219.148
2020-01-24 15:07:11,327 fail2ban.actions        [11121]: NOTICE  [nginx-badbots] Ban 223.98.64.36

다음 명령을 사용하여 Fail2ban에 의해 차단된 IP를 확인합니다.

# fail2ban-client status nginx-badbots

example output
Status for the jail: nginx-badbots
|- Filter
|  |- Currently failed: 0
|  |- Total failed:     28146

SELinux에서 Apache 또는 PHP-FPM이 원격 MySQL에 연결하도록 허용하는 방법

아파치 또는 PHP-FPM이 원격 MySQSL 서버에 연결할 수 없는 문제가 있는 경우, 아래와 같이 원격 서버의 PDO 연결 오류의 예시

SQLSTATE[HY000] [2002] Permission denied

먼저 다음 명령으로 SELinux가 활성화되어 있는지 확인해야 합니다.

[root@serverdiary ~]# sestatus
SELinux status:                 enabled
SELinuxfs mount:                /sys/fs/selinux
SELinux root directory:         /etc/selinux
Loaded policy name:             targeted
Current mode:                   permissive
Mode from config file:          disabled
Policy MLS status:              enabled
Policy deny_unknown status:     allowed
Max kernel policy version:      31

또는 /etc/selinux/config 에서 볼 수 있습니다.

SELINUX=enforcing

SELinux에는 3가지 옵션이 있습니다.

  1. enforcing – SELinux 보안 정책이 적용됩니다.
  2. permissive – SELinux는 시행하는 대신 경고를 인쇄합니다.
  3. disabled – SELinux 정책이 로드되지 않습니다.

허용으로 변경할 수 있으므로 SELinux는 시행하는 대신 경고만 인쇄합니다.

[root@serverdiary ~]# setenforce 0
[root@serverdiary ~]# sestatus
SELinux status:                 enabled
SELinuxfs mount:                /sys/fs/selinux
SELinux root directory:         /etc/selinux
Loaded policy name:             targeted
Current mode:                   permissive
Mode from config file:          disabled
Policy MLS status:              enabled
Policy deny_unknown status:     allowed
Max kernel policy version:      31

또는 SElinux 설정에서 옵션을 계속 사용하려면 이 명령을 루트로 적용하고 apache 또는 php-fpm을 다시 시작하십시오.

setsebool -P httpd_can_network_connect 1
setsebool -P httpd_can_network_connect_db 1

P 옵션은 영구적임을 의미하므로 재부팅 후에도 이 옵션이 계속 적용됩니다.

Google Two Factor Authenticator 2FA로 Cockpit 로그인을 보호하는 방법

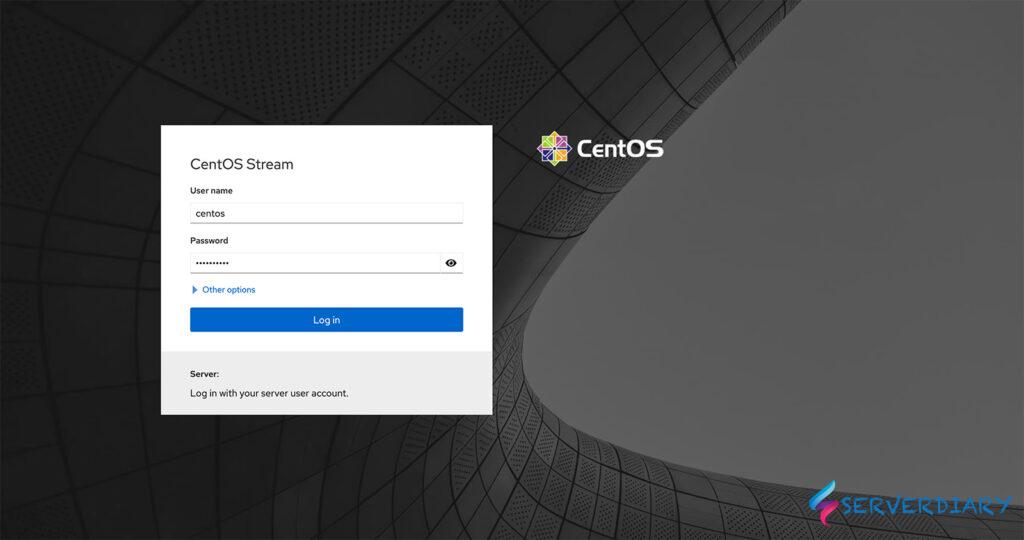
콕핏 로그인 페이지
Cockpit 로그인 페이지

Cockpit은 서버용 웹 기반 그래픽 인터페이스로, 모든 사람, 특히 다음과 같은 사용자를 대상으로 합니다.

  • Linux를 처음 사용하는 사용자(Windows 관리자 포함)
  • Linux에 익숙하고 서버를 그래픽으로 쉽게 관리할 수 있는 방법을 원합니다.
  • 주로 다른 도구를 사용하지만 개별 시스템에 대한 개요를 원하는 전문 관리자

Cockpit을 보호하기 위해 Google Two Factor Authenticator를 설치하는 방법

# dnf install google-authenticator qrencode-libs

Libqrencode는 CCD가 있는 휴대폰과 같은 편리한 단말기로 스캔할 수 있는 2D 기호인 QR 코드 기호로 데이터를 인코딩하기 위한 빠르고 컴팩트한 라이브러리입니다. QR Code의 용량은 최대 7000자리 또는 4000자이며 견고성이 높습니다.

CentOS에서 Libqrencode는 qrencode-libs 패키지에서 사용할 수 있습니다.

# google-authenticator -t -d -f -r 3 -R 30 -W

그런 다음 /etc/pam.d/cockpit을 편집하십시오.

# vi /etc/pam.d/cockpit

그리고 파일 끝에 다음 코드를 추가하십시오.

auth required pam_google_authenticator.so nullok

nullok 은 HOME 에 2FA가 없어도 계속 로그인 할 수 있음을 의미합니다.

다음 명령으로 Cockpit을 다시 시작합니다.

# systemctl restart cockpit.socket

이제 Cockpit은 Google Authenticator 2FA로 보호되었습니다.

비밀 키와 5개의 복구 코드가 포함된 홈 디렉토리 .google_authenticator 파일에서 코드를 확인할 수 있습니다.

6RJYXWAV3QO3PVWSTVEW7MA4TE
" RATE_LIMIT 3 30 1693590532
" WINDOW_SIZE 3
" DISALLOW_REUSE 56483718
" TOTP_AUTH
16286074
83920070
30194106
64370332
42120293

Certbot을 사용하여 Apache 또는 Nginx용 Let’s Encrypt SSL 인증서를 얻는 방법

이제 SSL은 SEO (Search Engine Optimization) 신호 중 하나입니다. Google 웹마스터 블로그에서 읽어보세요.

웹사이트가 한두 개뿐이라면 큰 문제가 없습니다. 가장 저렴한 SSL 비용은 연간 약 4-5 USD에 불과합니다.

그러나 100 개의 도메인이 있고 여러 하위 도메인이 필요하다고 상상해보십시오. 연간 약 20 달러의 비용이 드는 SAN 도메인과 연간 약 40 달러의 와일드 카드 도메인이 필요합니다.

예 1 도메인에는 5 개의 하위 도메인이 필요하고 www가 제외되므로 SAN SSL의 경우 2,000 USD, 와일드 카드 SSL의 경우 4000 USD의 비용이 듭니다.

Let’s Encrypt의 무료 솔루션이 있습니다.

Let’s Encrypt는 공공의 이익을 위해 운영되는 무료 자동화 개방형 인증 기관(CA)입니다. ISRG(Internet Security Research Group)에서 제공하는 서비스입니다.

Let’s Encrypt SSL은 3개월 동안 유효하며 만료되기 약 1개월 전에 갱신할 수 있습니다.

Centos 7 및 8에서 Let’s Encrypt를 생성하는 방법

Let’s Encrypt SSL을 생성하려면 certbot binyary가 필요합니다.

기본적으로 Certbot 패키지는 Centos/RHEL 패키지 관리자에서 사용할 수 없습니다.

Certbot을 설치하려면 EPEL 리포지토리를 활성화해야 합니다.

For CentOS/RHEL 7 Only
# yum install epel-release

위의 명령이 작동하지 않거나 CentOS 6 / RHEL 6을 사용하여 수동으로 설치할 수 있습니다.

For CentOS/RHEL 7
# yum install -y https://dl.fedoraproject.org/pub/epel/epel-release-latest-7.noarch.rpm
 
For CentOS/RHEL 6
# yum install -y https://dl.fedoraproject.org/pub/epel/epel-release-latest-6.noarch.rpm

다음 명령을 사용하여 Certbot를 설치합니다.

# yum install certbot

Let’s Encrypt 인증서 얻기

Nginx에서 Let’s Encrypt Certificate를 사용합니다.

Nginx 또는 Apache용 SSL을 생성할 때 독립형으로 사용합니다. 이 명령은 포트 80에서 실행되는 Nginx 또는 Apache 서비스를 중지하지 않고도 작동합니다.

# certbot certonly -a webroot --webroot-path=/home/serverdiary/public_html --renew-by-default --email [email protected] --agree-tos -d serverdiary.com -d www.serverdiary.com -d img.serverdiary.com

예제 출력 :

# certbot certonly -a webroot --webroot-path=/home/serverdiary/public_html --renew-by-default --email [email protected] --agree-tos -d serverdiary.com -d www.serverdiary.com
Saving debug log to /var/log/letsencrypt/letsencrypt.log
Plugins selected: Authenticator webroot, Installer None
........................

IMPORTANT NOTES:
 - Congratulations! Your certificate and chain have been saved at:
   /etc/letsencrypt/live/serverdiary.com/fullchain.pem
   Your key file has been saved at:
   /etc/letsencrypt/live/serverdiary.com/privkey.pem
   Your cert will expire on 2020-12-04. To obtain a new or tweaked
   version of this certificate in the future, simply run certbot
   again. To non-interactively renew *all* of your certificates, run
   "certbot renew"
 - If you like Certbot, please consider supporting our work by:

   Donating to ISRG / Let's Encrypt:   https://letsencrypt.org/donate
   Donating to EFF:                    https://eff.org/donate-le

이제 SSL 인증서 체인이 /etc/letsencrypt/live/serverdiary.com/fullchain.pem 및 키 파일 /etc/letsencrypt/live/serverdiary.com/privkey.pem에 저장됨

샘플 Nginx 구성 :

server {
	listen       80;
	server_name  serverdiary.com;
	
	root   /home/serverdiary/public_html;
	index  index.php index.html index.htm;
	
	location / {
		return 301 https://serverdiary.com$request_uri;
	}
}
server {
	listen       80;
	server_name  www.serverdiary.com;
	
	root   /home/serverdiary/public_html;
	index  index.php index.html index.htm;
	
	location / {
		return 301 https://serverdiary.com$request_uri;
	}
}
server {
	listen  213.133.110.88:443 ssl http2;
	server_name www.serverdiary.com;
	
	root   /home/serverdiary/public_html;
	index  index.php index.html index.htm;

	access_log off;
	ssl_certificate    		/etc/letsencrypt/live/serverdiary.com/fullchain.pem;
	ssl_certificate_key		/etc/letsencrypt/live/serverdiary.com/privkey.pem;
	
	ssl_session_cache  builtin:1000  shared:SSL:10m;
    #enables all versions of TLS, but not SSLv2 or 3 which are weak and now deprecated.
	ssl_protocols TLSv1 TLSv1.1 TLSv1.2;
    ssl_ciphers HIGH:!aNULL:!eNULL:!EXPORT:!CAMELLIA:!DES:!MD5:!PSK:!RC4;
    ssl_prefer_server_ciphers on;
	ssl_session_timeout 1d;
	ssl_session_cache shared:SSL:10m;
	add_header Strict-Transport-Security max-age=6048000;
	
	location / {
		return 301 https://serverdiary.com$request_uri;
	}
}
	
server {
	listen  213.133.110.88:443 ssl http2;
	server_name serverdiary.com;
	
	root   /home/serverdiary/public_html;
	index  index.php index.html index.htm;

	gzip	on;
	ssl_certificate    		/etc/letsencrypt/live/serverdiary.com/fullchain.pem;
	ssl_certificate_key		/etc/letsencrypt/live/serverdiary.com/privkey.pem;
	
	#enables all versions of TLS, but not SSLv2 or 3 which are weak and now deprecated.
	ssl_protocols TLSv1 TLSv1.1 TLSv1.2;
    ssl_ciphers HIGH:!aNULL:!eNULL:!EXPORT:!CAMELLIA:!DES:!MD5:!PSK:!RC4;
    ssl_prefer_server_ciphers on;
	ssl_session_timeout 1d;
	ssl_session_cache shared:SSL:10m;
	add_header Strict-Transport-Security max-age=6048000;
	
	access_log /var/log/nginx/serverdiary.com.ssl.access.log;
	error_log /var/log/nginx/serverdiary.com.ssl.error.log;
	
	location ~* ^.+\.(jpg|jpeg|gif|png|ico|css|zip|tgz|gz|rar|bz2|pdf|txt|tar|wav|bmp|rtf|js|flv|swf|htm|eot|woff|woff2|ttf|svg|otf)$ {
		add_header Cache-Control "public";
		expires 60d;
		log_not_found off;
		access_log off;
	}
	location ~ /.well-known {
		allow all;
	}
	
	...........
	...........
}

연관된 글 :자동 갱신 Systemd를 사용하여 SSL 인증서를 암호화하고 성공하면 Nginx / Apache를 다시 시작합시다.

자동 갱신 : Systemd를 사용하여 SSL 인증서를 암호화하고 성공하면 Nginx / Apache를 다시 시작하기

약 100 또는 200 개의 SSL이 있고 다른 날짜에 생성하면 어떻게 될까요?

예, 큰 문제가 있으며 Let’s Encrypt조차도 SSL 인증서가 약 30일 또는 15일 후에 만료될 때 알려줍니다.

우리는 리눅스 크론잡을 사용할 수 있고, 나는 그것을 사용한 적이 있다. 그러나 그것은 좋은 생각이 아닙니다.

더 좋은 방법은 systemd 서비스와 systemd timer 를 사용하는 것입니다.

systemd.service 및 systemd.timer를 만들어 Let’s Encrypt SSL 인증서를 갱신합니다.

우리는 새로운 Let’s Encrypt SSL 인증서를 얻을 때 Certbot을 독립형으로 사용합니다.

갱신 구성은 /etc/letsencrypt/renewal에 있습니다.

이제 /etc/letsencrypt/renewal 파일을 확인합니다(예: /etc/letsencrypt/renewal/serverdiary.com.conf).

# renew_before_expiry = 30 days
version = 1.0.0
archive_dir = /etc/letsencrypt/archive/serverdiary.com
cert = /etc/letsencrypt/live/serverdiary.com/cert.pem
privkey = /etc/letsencrypt/live/serverdiary.com/privkey.pem
chain = /etc/letsencrypt/live/serverdiary.com/chain.pem
fullchain = /etc/letsencrypt/live/serverdiary.com/fullchain.pem

# Options used in the renewal proces
[renewalparams]
authenticator = webroot
account = hidden
server = https://acme-v02.api.letsencrypt.org/directory
webroot_path = /home/serverdiary/public_html
post_hook = systemctl restart nginx
[[webroot_map]]

webroot_path 동일하기 때문에 webroot_map에 대한 구성이 없습니다.

webroot_path가 다른 단일 SSL에 대한 webroot_map 예

[[webroot_map]]
serverdiary.com = /home/serverdiary/public_html
www.serverdiary.com = /home/serverdiary/public_html
img.serverdiary.com = /home/serverdiary/public_html/img

/etc/systemd/system/letsencrypt.service 파일을 만듭니다.

# vi /etc/systemd/system/letsencrypt.service

그리고 아래에 코드를 붙여 넣으십시오.

[Unit]
Description=Certbot Renewal

[Service]
ExecStart=/usr/local/bin/certbot renew --post-hook "systemctl reload nginx"

/etc/systemd/system/letsencrypt.time 파일을 만듭니다.

# vi /etc/systemd/system/letsencrypt.timer

아래에 코드를 붙여 넣으십시오.

[Unit]
Description=Timer for Certbot Renewal

[Timer]
OnBootSec=300
OnUnitActiveSec=6h

[Install]
WantedBy=multi-user.target

사용 권한을 755로 변경합니다.

# chmod 755 /etc/systemd/system/letsencrypt.service
# chmod 755 /etc/systemd/system/letsencrypt.timer

sysmctl 데몬을 다시 로드하고, 시스템 시작 시 활성화하고, 다음 명령으로 서비스를 시작합니다.

# systemctl daemon-reload
# systemctl enable /etc/systemd/system/letsencrypt.service
# systemctl enable /etc/systemd/system/letsencrypt.timer
# systemctl start /etc/systemd/system/letsencrypt.service
# systemctl start /etc/systemd/system/letsencrypt.timer

Letsencrypt.timer는 6시간마다 Letsencrypt.service를 호출하고 SSL이 하나 성공적으로 갱신되면 Nginx 서비스가 다시 시작됩니다.

이제 Let’s Encrypt SSL 만료 시간을 잊을 수 있습니다. 그러나 때로는 웹사이트의 SSL이 갱신되었는지 확인하는 것을 잊지 마십시오.

CentOS 9 Stream에서 REMI 저장소를 설치하고 활성화하는 방법

Remi 저장소는 Red Hat, CentOS, Fedora와 같은 Enterprise Linux에서 PHP의 최신 업데이트가 있는 타사 저장소 중 하나입니다.

Remi의 RPM 리포지토리 사이트에 대한 자세한 내용은 https://rpms.remirepo.net 에서 확인할 수 있습니다.

Centos에 Remi 저장소를 설치하려면 먼저 CentOS 9 Stream / RHEL 9에서 EPEL 저장소를 활성화해야합니다

CodeReady Linux Builder 리포지토리를 활성화합니다. 우리는 이미 그것에 액세스 할 수 있습니다. 활성화하기만 하면 됩니다.

CentOS 9 스트림에서:

CentOS 9 스트림에서:

sudo dnf config-manager --set-enabled crb

RHEL 9의 경우:

sudo subscription-manager repos --enable codeready-builder-for-rhel-9-$(arch)-rpms

그런 다음 CentOS 9 Stream에서 Epel을 활성화하십시오.

sudo dnf install epel-release epel-next-release

RHEL 9의 경우:

sudo dnf install \
https://dl.fedoraproject.org/pub/epel/epel-release-latest-9.noarch.rpm

Remi Repository 설치 및 활성화

sudo dnf install dnf-utils http://rpms.remirepo.net/enterprise/remi-release-9.rpm

그런 다음 DNF를 새로 고치고 GPG 키를 가져와야 합니다

sudo dnf update --refresh

CentOS 9 Stream에 PHP 8.2 설치

공식 CentOS 9 Stream 저장소, PHP 8이 포함되어 있으므로 비활성화해야 합니다

sudo dnf module reset php

시스템에서 사용할 수 있는 모든 모듈을 나열하려면 다음을 수행합니다.

sudo dnf module list php

예제 출력

# sudo dnf module list php
Last metadata expiration check: 0:09:25 ago on Thu 08 Jun 2023 01:21:06 PM CDT.
CentOS Stream 9 - AppStream
Name                                    Stream                                          Profiles                                                      Summary
php                                     8.1                                             common [d], devel, minimal                                    PHP scripting language

Remi's Modular repository for Enterprise Linux 9 - x86_64
Name                                    Stream                                          Profiles                                                      Summary
php                                     remi-7.4                                        common [d], devel, minimal                                    PHP scripting language
php                                     remi-8.0                                        common [d], devel, minimal                                    PHP scripting language
php                                     remi-8.1                                        common [d], devel, minimal                                    PHP scripting language
php                                     remi-8.2                                    common [d], devel, minimal                                    PHP scripting language

Hint: [d]efault, [e]nabled, [x]disabled, [i]nstalled

PHP 8.3 Remi 모듈 활성화 및 CentOS 9 Stream에 PHP 8.3 설치

sudo dnf module enable php:remi-8.3

그런 다음 다음 명령을 사용하여 PHP를 설치할 수 있습니다.

sudo dnf install php php-devel php-fpm php-cgi php-gd php-opcache php-apcu php-mbstring php-gd php-imagick php-xml php-json php-mysqlnd php-pdo

rkhunter 설치 & 사용법

# dnf -y install rkhunter
서브스크립션 관리 저장소를 최신화하기.

마지막 메타자료 만료확인(2:52:06 이전): 2024년 08월 30일 (금) 오전 05시 49분 17초.
종속성이 해결되었습니다.
=====================================================================================================================
 꾸러미                    구조                    버전                             저장소                      크기
=====================================================================================================================
설치 중:
 rkhunter                  noarch                  1.4.6-17.el9                     epel                       184 k
종속 꾸러미 설치 중:
 s-nail                    x86_64                  14.9.22-8.el9                    appstream                  622 k

연결 요약
=====================================================================================================================
설치  2 꾸러미

전체 내려받기 크기: 805 k
설치된 크기 : 2.0 M
꾸러미 내려받기 중:
(1/2): s-nail-14.9.22-8.el9.x86_64.rpm                                               2.4 MB/s | 622 kB     00:00    
(2/2): rkhunter-1.4.6-17.el9.noarch.rpm                                               86 kB/s | 184 kB     00:02    
---------------------------------------------------------------------------------------------------------------------
합계                                                                                 264 kB/s | 805 kB     00:03     
연결 확인 실행 중
연결 확인에 성공했습니다.
연결 시험 실행 중
연결 시험에 성공했습니다.
연결 실행 중
  준비 중     :                                                                                                  1/1 
  구현 중     : s-nail-14.9.22-8.el9.x86_64                                                                      1/2 
  설치 중     : s-nail-14.9.22-8.el9.x86_64                                                                      1/2 
  구현 중     : s-nail-14.9.22-8.el9.x86_64                                                                      1/2 
  설치 중     : rkhunter-1.4.6-17.el9.noarch                                                                     2/2 
  구현 중     : rkhunter-1.4.6-17.el9.noarch                                                                     2/2 
  확인 중     : s-nail-14.9.22-8.el9.x86_64                                                                      1/2 
  확인 중     : rkhunter-1.4.6-17.el9.noarch                                                                     2/2 
설치된 제품이 최신화되었습니다.

설치되었습니다:
  rkhunter-1.4.6-17.el9.noarch                              s-nail-14.9.22-8.el9.x86_64                             

완료되었습니다!


# rkhunter 업데이트
[root@localhost ~]# rkhunter --update


# 시스템 파일 속성 업데이트
[root@localhost ~]# rkhunter --propupd
[ Rootkit Hunter version 1.4.6 ]


# 루트킷 점검 실행
# [--sk] 엔터(Enter)키 입력 패스 옵션
# [--rwo] 경고(warnings)만 출력하는 옵션
[root@localhost ~]# rkhunter --check --sk

...
System checks summary
=====================

File properties checks...
    Files checked: 135
    Suspect files: 0

Rootkit checks...
    Rootkits checked : 495
    Possible rootkits: 0

Applications checks...
    All checks skipped

The system checks took: 1 minute and 59 seconds

All results have been written to the log file: /var/log/rkhunter/rkhunter.log

One or more warnings have been found while checking the system.
Please check the log file (/var/log/rkhunter/rkhunter.log)


# 점검 로그 보기
[root@localhost ~]# tail /var/log/rkhunter/rkhunter.log

...
[08:44:17] Rootkit checks...
[08:44:17] Rootkits checked : 495
[08:44:17] Possible rootkits: 0
[08:44:18]
[08:44:18] Applications checks...
[08:44:18] All checks skipped
[08:44:18]
[08:44:18] The system checks took: 1 minute and 59 seconds
[08:44:18]
[08:44:18] Info: End date is 2024. 08. 30. (금) 08:44:18 KST